

Russian Fishing 4: why a new reel can still break
Zero wear does not prevent overload. Check the weakest tackle component, load indicator, drag and damaged parts before paying for repairs in RF4.
Published · Updated
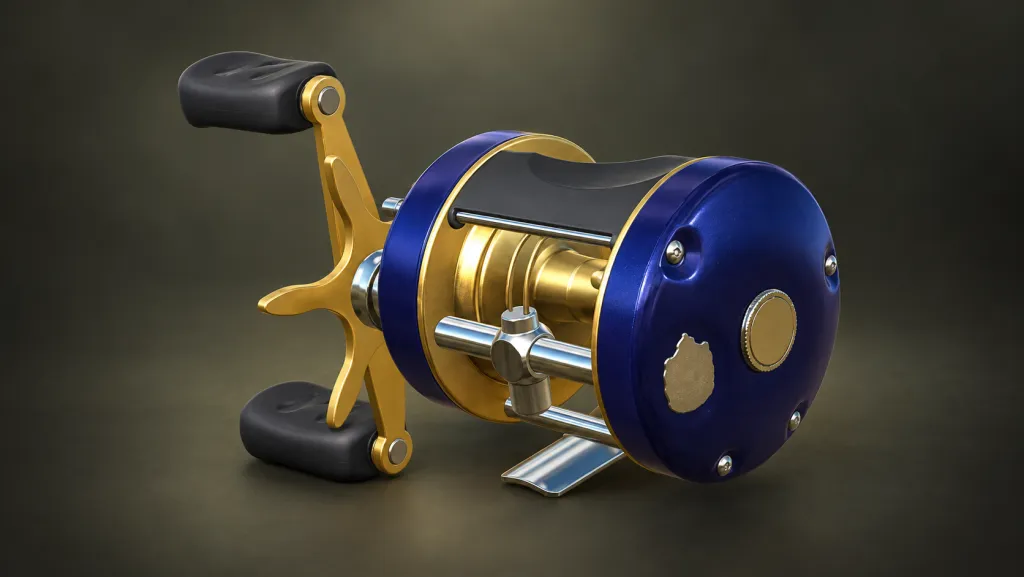
A new reel does not remove the risk of overload. In the official explanation of RF4's load indicator, in the Polish guide, the bar relates to the weakest component of the whole setup. Zero wear alone therefore does not mean your tackle is protected. Here is what to inspect before casting, which indicator to watch while fighting a fish and what to establish after a failure.
Wear and current load answer different questions
In a Steam discussion started on 4 October 2026, a new player described a reel breaking with zero wear. The author also suggested that they may have fully tightened the drag. That account cannot establish the exact cause or prove a game bug. It does raise a useful point: a component in good condition cannot withstand every load.
Wear is deterioration through use. Current load is what the tackle is experiencing now, such as a fish's sudden pull. Check component condition before fishing and the load indicator during the fight. Working tackle still has a limit; a lack of accumulated wear does not remove it.

The full-size original bar is the load indicator. The guide lists the components involved in determining the weakest link: rod, reel, line, leader and hook. Exceeding the critical level can break the weakest component; severe overload can damage several. Do not read the bar's position as a direct measurement of fish weight.
Check the whole setup before casting
Do not stop at the new reel's name. Open the assembled rod and inspect the line, leader and hook currently fitted. A leader is the section between the main line and the terminal rig. Replacing one item leaves the other components in the same chain: buying a reel does not strengthen them.
If you copied a setup from a video or post, use the guide to checking another player's rig and conditions. It explains which details to compare. The next question here is not only whether the setup looks similar, but what condition its parts are in. Establish an unknown specification rather than assuming it should hold.
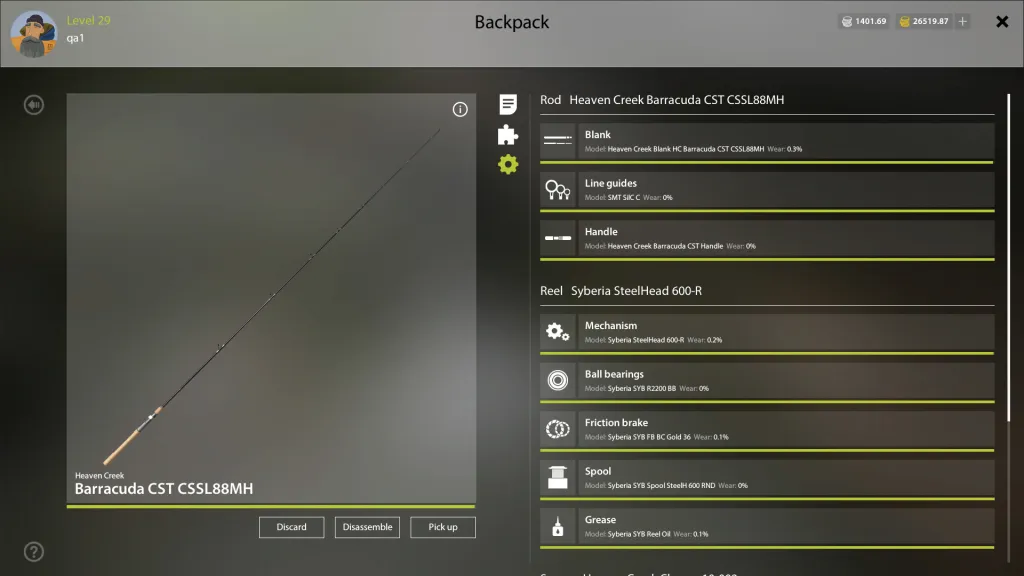
The full-size condition screen has separate Wear values for the blank, guides, mechanism, bearings, friction brake, spool and grease. The blank is the rod's main structural body. The reel's mechanism and drag are listed separately: a zero on one row does not describe the entire setup.
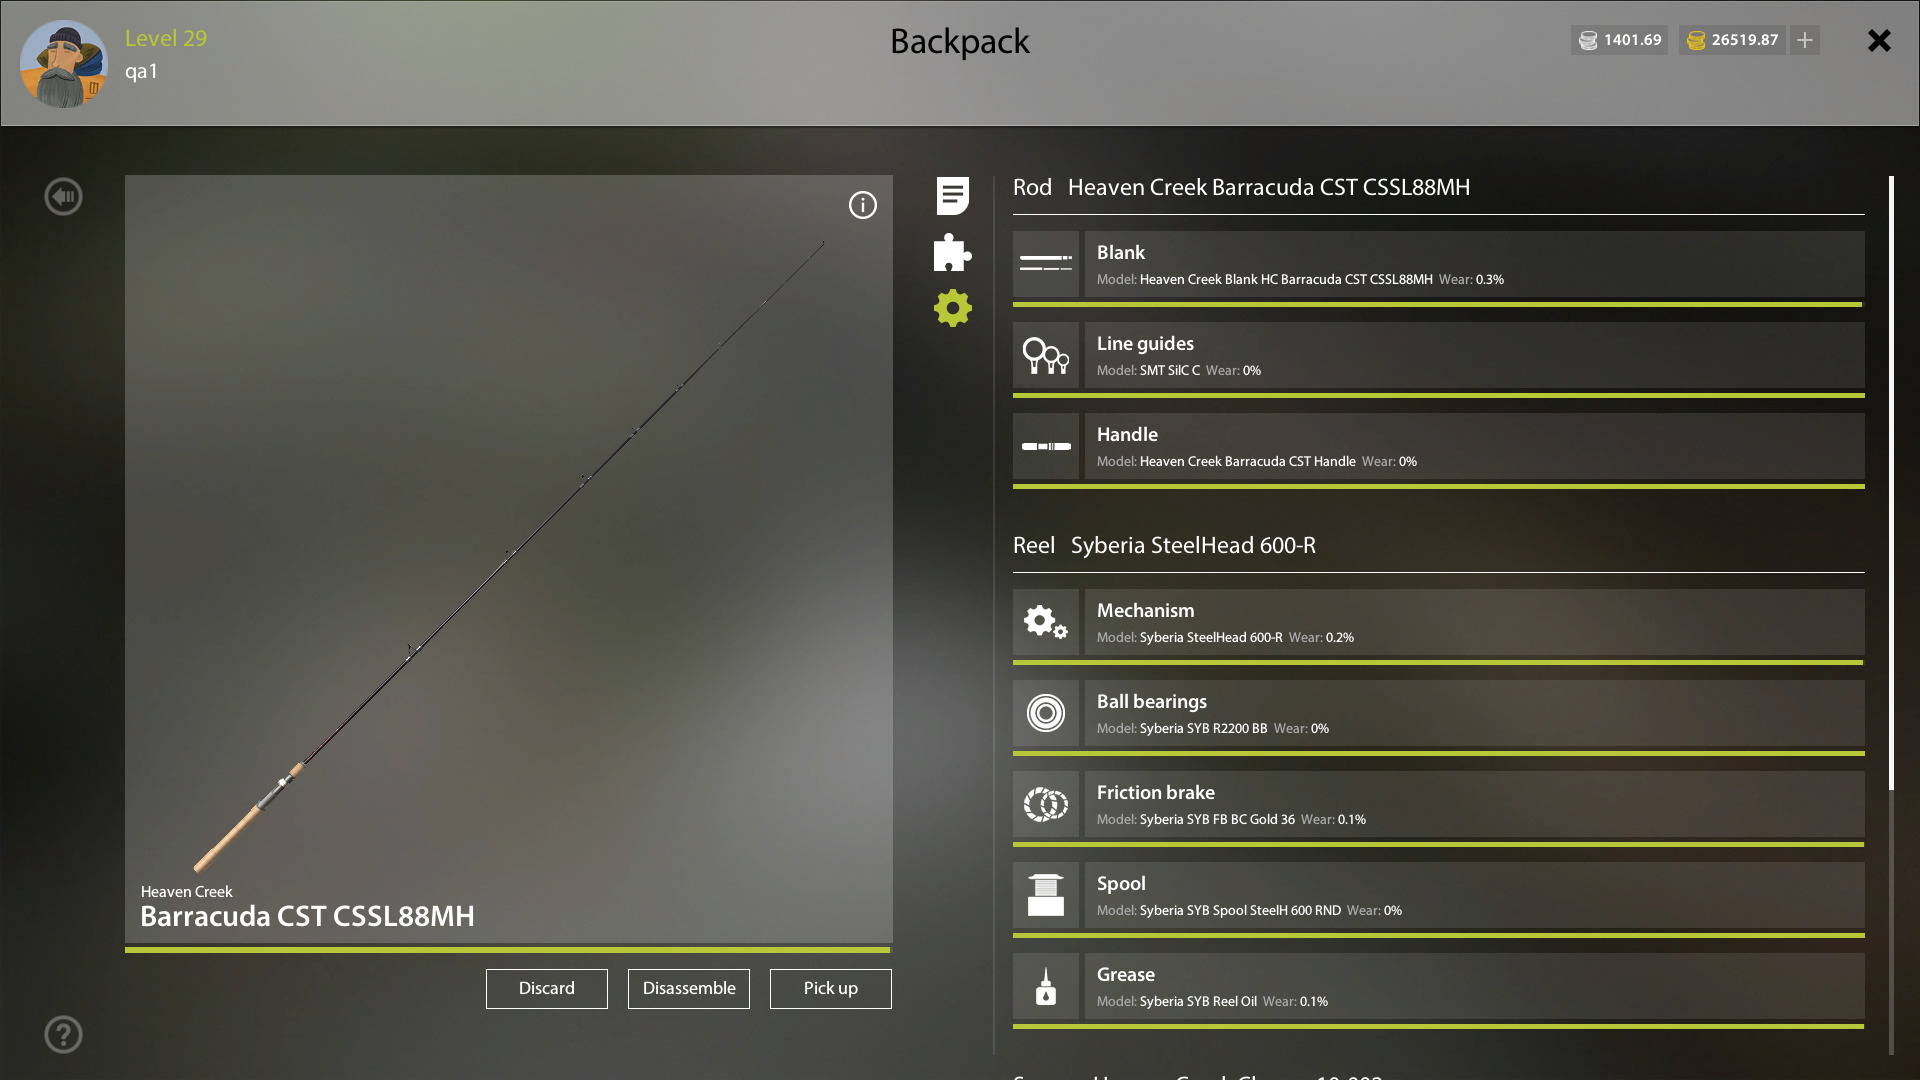
Do not turn percentages from this example into universal repair thresholds. They describe one archived setup. Inspect your own item and its components in the client. The official maintenance section separately warns that wear reduces tackle performance and increases failure risk; worn grease can accelerate wear on the mechanism and bearings.
Do not try to overpower a fish under dangerous load
The reel's drag, or friction brake, allows line to run out under load. The official fish-fighting section recommends loosening it when the load is high; the described controls use the mouse wheel. Watch how the indicator actually responds rather than copying one drag setting for every setup.
The guide identifies danger as the bar turns orange and then red. If the load becomes critical, stop trying to bring the fish in faster at any cost. Fully tightening the drag does not provide free extra strength. Do not test expensive tackle's limit with sharp pulls simply because you bought it recently.
There is no universal drag setting here, no formula equating wear percentage with strength loss and no guaranteed catch weight. The useful habit is simpler: inspect the setup and its condition before casting, then monitor load and drag during the fight. This reduces uninformed decisions; it cannot promise to save every fish or every piece of tackle.
After a failure, establish which component broke
Open the item's condition screen and identify the damaged component. Do not begin by buying another reel or paying for every service at once. The official repair section specifically states that a broken rod blank cannot be repaired. For other components, check the available repair or replacement at the workshop; the operation's name matters as much as its price.
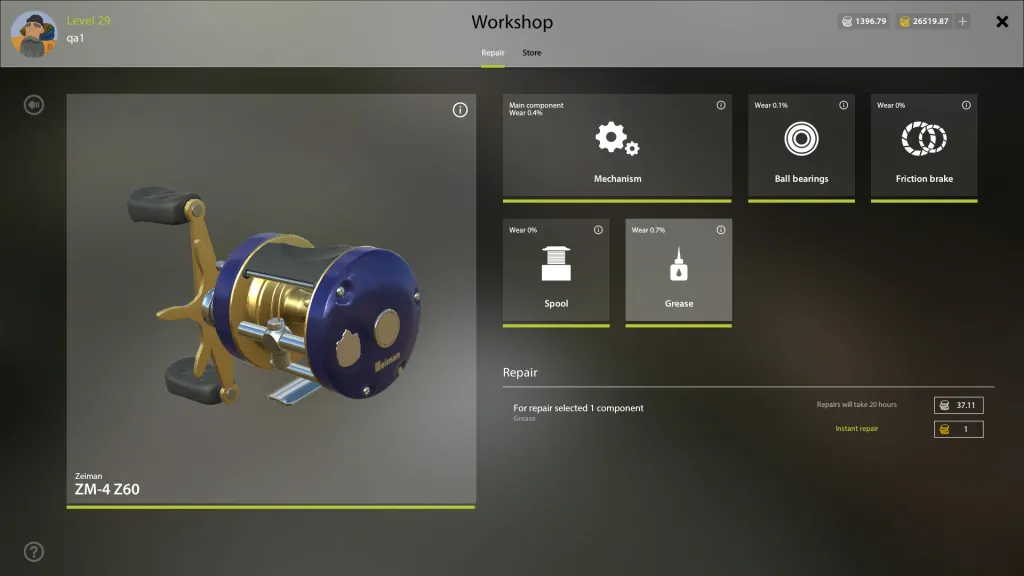
The full-size original workshop screen lists the mechanism, bearings, brake, spool and grease separately. At the bottom, one grease operation is selected, not a complete reel restoration. An attractive amount on someone else's screenshot is therefore not automatically the cost of repairing your failure.
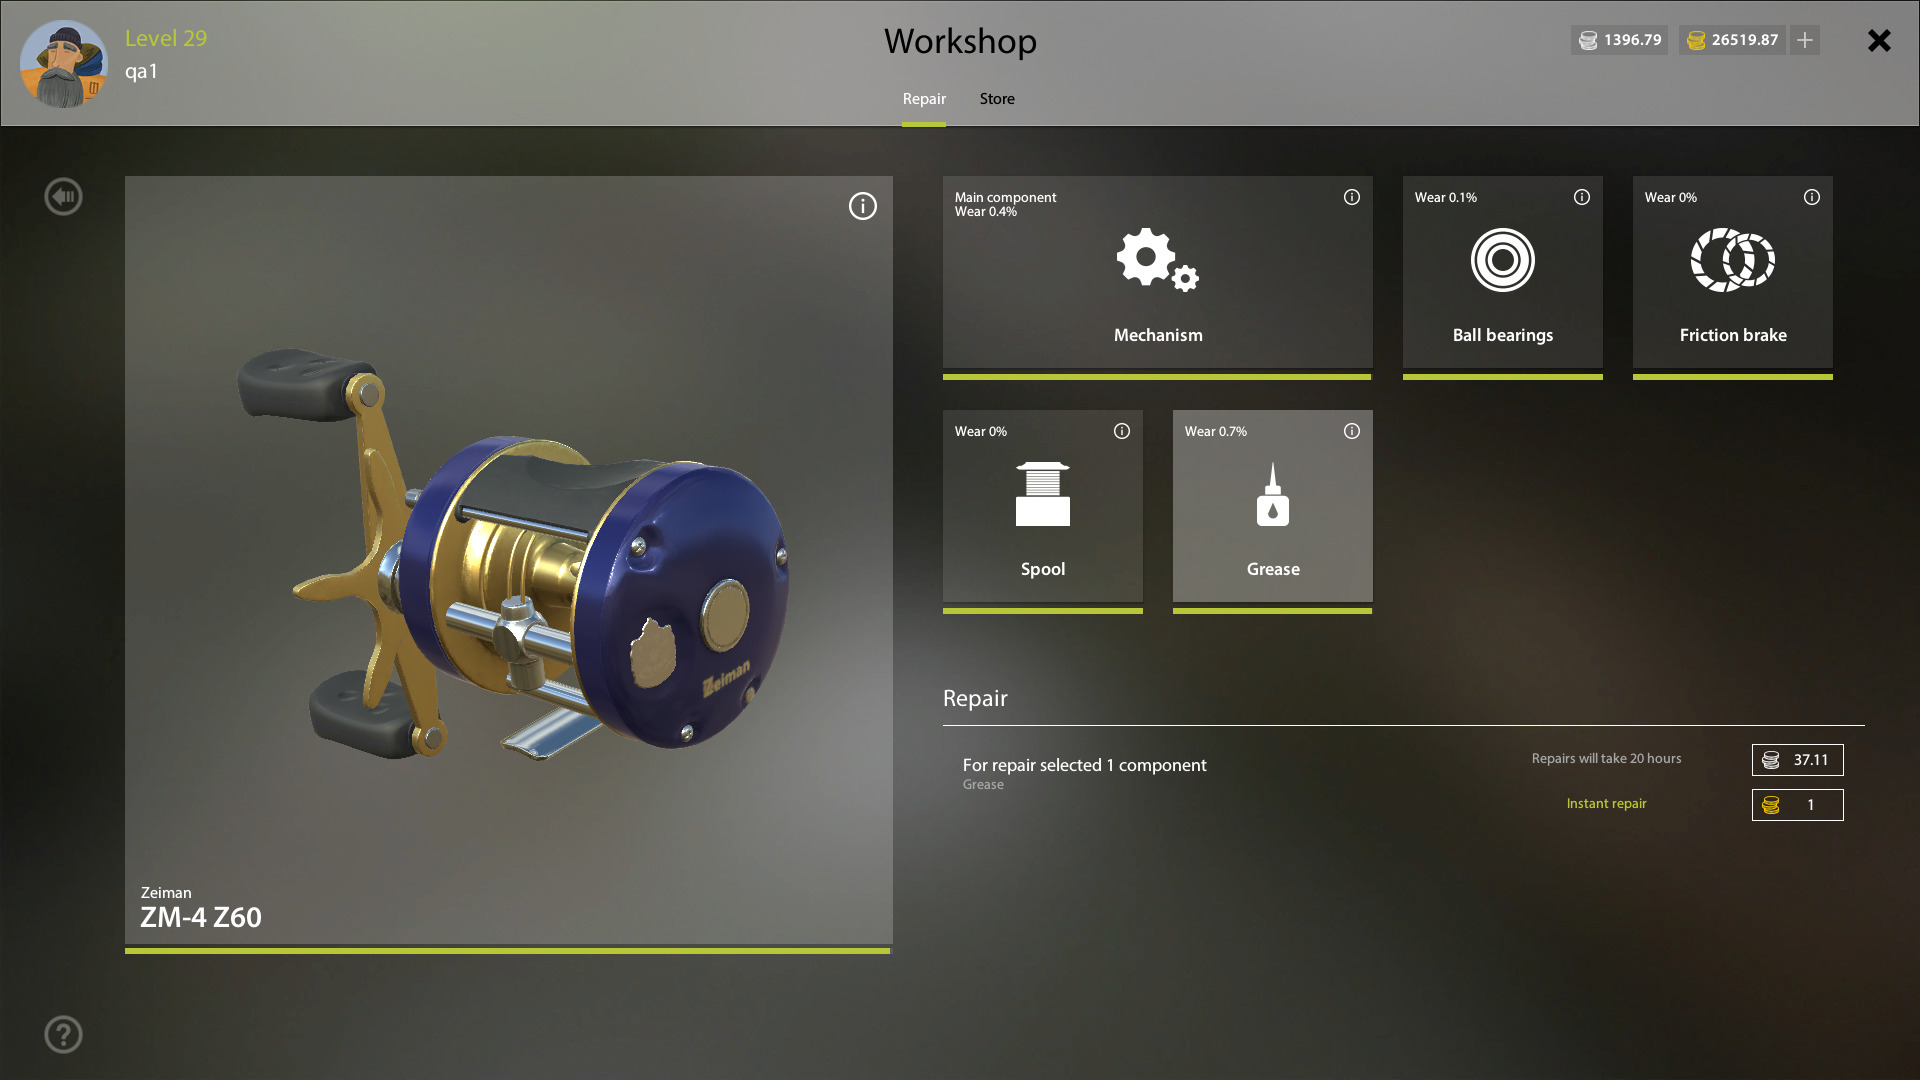
Before paying, check the selected part, available operation, currency and duration in your own window. The workshop guide says servicing for silver takes time, while servicing for gold is immediate. The archived frame illustrates those options; it does not confirm today's price or duration. After the work, reopen the item's condition screen and check the result before fishing.
For the next attempt, you need more than the label new reel: know the components, check their condition and monitor load during the fight. If a failure recurs without a clear cause, save the original setup, condition screen and a description of when it failed. Those details are more useful for diagnosis than one wear figure or an impression that the fish looked small.